This page has information on preparing a gravel base, and installation of a concrete strip,
How to Build a Gravel Wicket in Canada
From Angus Bell, Pirates of the St. Lawrence
Here’s what our club did. There are variations, depending on what local authorities/landlords will let you do, availability of materials, workers, time, cost, drainage, climate, and how you want it to play.
Tools and machinery
Digger – at a guess, 240$-400$
Skip – 120$
Two-ton drive-on asphalt roller – 240$/day, 420$/weekend
Shovels
Rakes
Watering cans
Two straight 10′ x 2” x 4” beams for levelling
Spirit measure
Materials
Geo textile flooring for wicket
70′ x 9′ x 6” of clean 3/4 stone – ~500$ (depending on distance of delivery).
70′ x 9′ x 6” of stonedust (heavily compacted) ~500$ (depending on distance of delivery).
Knife for cutting geo textile
Ball of string
Sixteen 10′ x 2” x 4” beams for lining wicket – ~50$ (optional)
Hessian or jute mat (~975$)
Large nails with washers to pin mat
Construction
1. Mark out a wicket 70ft long x 9ft wide with string, with a north-south allignment.
2. Dig out the wicket area, 1ft deep. You need a proper digger for this, and a skip close to the wicket to dump the soil. With the right equipment in place, a hard-working team, decent weather, and early start, you can dig the hole in a full day.
3. Lay a geo textile on the floor and sides of the wicket. This stops the stones dissapearing over the years.
4. With the digger, add 3 inches of clean 3/4 stone for drainage into the wicket and compact it with a heavy roller.
5. Add another 3 inches of clean 3/4 stone and then compact with heavy roller.
6. Add an inch of stonedust with the digger and as many shovellers as you can. Level it off with rakes and two straight 10′ x 2” x 4” beams, using two people on each beam and a sawing action across the wicket.
7. Wet the stonedust with watering cans.
8. Compact the stonedust with the heavy roller, maybe three or four times – twice with the vibrating compaction function, then twice without. The moment you no longer see the gravel compacting, stop. If you over compact it, or don’t use enough water, the stonedust will crack and crumble. If this happens, sprinkle more water on it and start with the next layer.
9. Add another inch of stonedust, level it, wet it, and compact.
10. At this stage you can use wood to board up the sides of the wicket, up to ground level. This helps to maintain the level of the wicket each year, prevent weeds creeping in, and keep the shape. This stage is optional.
11. Repeat the additions of stonedust, levelling, and compaction, one inch at a time. The levelling is crucial at this stage. Use a spirit measure to check it is flat and even throughout. Wet and compact. Again, use the roller only ’til the point of no more compaction. You should see slight water seepage as the roller goes over it.
12. When you’re not compacting the wicket, you can use the heavy roller to flatten the outfield. The best time is when the soil is moist. Don’t do it if the ground is saturated, as this will seal the top, upset the drainage and new grass growth.
13. Leave the wicket to set for a week. It should be ready to lay a hessian/jute mat over the top.
Maintenance and extras
1. Stop your bowlers and batsmen running on the mat! This will cause MASSIVE unseen damage to the wicket underneath, and before long you will see snakes spitting on a length.
2. You can pick up a cheap artificial grass carpet from any hardware store. You can nail these on the gravel at the bowlers’ ends, to stop gravel being kicked onto the mat and cover the footmarks.
3. Have a broom to sweep gravel off the mat mid-innings.
4. Every Wednesday before a weekend match, give the pitch a roll with a light roller (~120$ from Home depot – you can fill it with water or gravel to add weight), and then a light watering with watering cans. If sunshine is forecast, the pitch will harden before the match.
5. If there has been damage to the wicket, from players running on the mat, you may have to re-level the surface, or areas of the surface, with a 2” x 4” beam, before giving it a light roll and then watering.
6. You can get some plastic plumbing tubing from any hardware store (~16$). Cut it into foot-long pieces and bury them either side of the wicket, up to ground level. Now you have post holes for nets. Four wooden 2” x 4′ x 10′ cost about 12$.
7. If you are pros, and heavy rain is forecast on Thursday/Friday, stick covers over the wicket. You can get three large tarps from Canadian Tyre for ~150$. Take them off when the sun is out, so it can harden, not sweat.
8. Never ever roll up and store your mat if it is wet. It MUST dry out before you do this, otherwise it will rot. If you have a secure field, you can leave it pinned out in the sun. Come and turn it to let the other side dry, then put it away.
9. Note, the mat will stretch over time.
10. Each spring, using the back of a rake, take off the top 1/2 inch-1 inch of gravel. You will see that the finer particles have been washed away during autumn and winter, and just loose stones remain. Using the steps above, key in another layer of new stonedust.
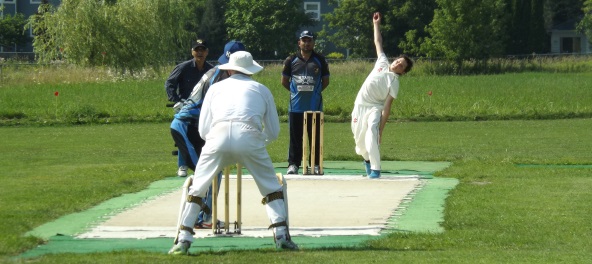
Play on Angus Bell’s Candy Fields pitch
Concrete pitches
From Dubbo District Cricket Association (Geoff McMillan)
Concrete Synthetic Cricket Wicket
A concrete synthetic wicket consists of a concrete slab with a synthetic grass carpet glued to the surface. It is suitable for junior and senior cricket at all grades up to 1st Grade. With normal care the synthetic grass surface should last up to ten years before replacement.
Refer to the attached plan which shows the wicket being a single concrete slab in the shape of a rectangle 2.00 x 20.12 metres (22 yards) with “flares” at each end to serve as bowlers runups. The flares start at 2.00 metres increasing to 4.00 metres in width, with either side being 5.00 metres. The concrete slab is thus 29.92 metres long, varying in width from 4 metres to 2 metres. On top of the concrete slab is stuck a synthetic grass surface 22 metres long and 1.83 metres wide.
Materials
• 7 x cubic metres 20mpa concrete
• 70 sqm plastic sheeting to go under concrete slab (optional).
• 65 sqm reinforcing mesh (suggest 7mm bars at 200mm centres)
• 100 plastic “bar chairs” to support reinforcing mesh.
• 1 x 22m x 1.83m SuperGrasse Shield grade synthetic grass carpet
• 20ltr Everstick carpet glue
Tools
• 70 to 75m x 100mm concrete formwork. 14 x 5m lengths of 100mm C sections would be ideal and can be reused on each wicket.
• 2 x blocks of wood 300x100x50mm
• Concrete finishing tools including edge trowels, screed level, whirly-bird.
• Carpet laying tools including notched contact glue trowel and carpet roller.
• 1 x small can white paint and 1″ brush.
Approach
The steps involved in developing a concrete synthetic wicket are:
• Select a suitable site
• Arrange sufficient funding to pay for your materials
• Secure any necessary approvals from Council or the owner of the land
• Arrange sufficient suitably qualified labour
• Lay the concrete slab and leave it for several days to cure
• Lay the synthetic surface
• Mark the crease lines
• Leave it for a day before playing on it
a) Site selection
The wicket should be located in the centre of a cricket ground. Ideally, for senior cricket the ground should be large enough to mark an oval boundary measuring 65 metres from the stumps at either end of the wicket. The recommended size for U/10’s is 40 mteres and U/14’s 55 metres.
The wicket should be aligned to run approximately north-south so that the setting sun does not distract either batsmen or bowlers.
Ideally, the site of the wicket should be slightly higher than the surrounding outfield to allow run off of water after rain.
If other sports use the ground during the off-season then try and position the wicket so it does not fall within the boundary of soccer, football or hockey fields. If the wicket does fall within such a boundary it will be necessary to cover the wicket with dirt during the off season. This involves extra labour and can shorten the life of the wicket. A synthetic wicket can tolerate normal spectator traffic if it is located between two football, soccer or hockey fields.
b) Funding
You must confirm how your wicket will be paid for before you start construction.
There are three main elements of cost: the concrete slab; the synthetic mat; and labour. You can reduce the cost of your wicket by addressing each of these elements separately.
Labour
If you are lucky your labour cost will be reduced to a couple of cases of beer. You should be able to recruit or press-gang local players or supporters who have some experience in the tasks required who will “volunteer” their services in return for a cold drink when their task is finished. If you have cultivated good relations with your local council then they may supply their expert staff free of charge or for a nominal sum. You will need one person to manage the project, an expert concrete finisher to supervise laying the slab, a carpet layer to install the synthetic mat, and several labourers.
Concrete slab
You should be able to get the local council to cover the cost of concrete for the slab if you undertake to supply the labour. The argument is that the wicket becomes their asset available for community use when not used for your competitions. You may need to negotiate a cash contribution towards part of council’s cost for the concrete – this will depend on your standing with them, but remember they can usually buy it cheaper than you can. If this doesn’t work you may be able to call on some personal favours to secure a good deal from the local concrete supplier, or you may be able to offer a sponsorship deal in return for advertising etc. The hard way is to mix the concrete by hand.
Synthetic mat
Your cricket association has hopefully negotiated a good deal on the purchase price of the synthetic mat, but you will most likely be called on to cover some, or all of this cost. Determine from them how much you have to pay (and when) and then work out how you are going to cover it. Since a synthetic mat is an identifiable thing you should be able to make it the focus of a special fund raising effort:
• You might secure a local sponsor who will donate the cost in return for publicity, or a sign at the ground, or some other favour that your group does for him.
• A local community group (eg Lions Club) may adopt it as a project if you demonstrate that it will be good for local kids.
• It may be the excuse for running a fund raising disco or other function.
• You may get the local council to pay for it.
• You might apply a special levy of say $1 per week on your local players.
• Or a combination of the above.
When looking to raise funds for a project such as this, remember:
• If you can’t negotiate on the price, try and negotiate on the terms (ie when you have to pay it).
• Identify all those who will receive a benefit from the project and then look to what you can get out of each of them in terms of cash or labour or favours returned. In the case of a synthetic wicket the beneficiaries would include your local cricket clubs/teams, local players, schools (they will use it), council (they will own it), the local pub (if you drink there after the game), the local sports store (if it leads to more players buying bats and kit), etc.
c) Approvals
You will need approval from the owner of the land (usually council).
You should also seek approval from other sports that use the ground to make sure that they will not be unnecessarily inconvenienced either by the location of your wicket or by your construction process. This can normally be done via the local sports council.
top of it. The idea is that we want to create a gentle slope from the natural ground level up to the surface of the concrete slab.
Place dirt in the voids where the stumps go.
d) Labour
See the previous discussion under Funding.
You will need one person to manage the project, an expert concrete finisher to supervise laying the slab, a carpet layer to install the synthetic mat, and several labourers. These will be required as two teams, one to lay the concrete slab (the concrete finisher and at least four labourers) and one about a week later to lay the synthetic (carpet layer and two labourers).
e) Concrete slab
The tasks here are:
• Prepare and level the site
• Set up the form work
• Lay and finish the slab
• Keep everyone off it until it dries
Levelling the site can be done at any time, but preferably just before you set up the formwork (so no one stuffs it up).
Setting up the formwork and reinforcing should take two to three hours and be done late on the afternoon before you pour the concrete.
The concrete should be poured around 8:00 in the morning which means the finishing will be done by lunch time and the formwork can be removed. You will then need someone to act as security guard to keep everyone off it until late afternoon by which time it will be hard enough to stop people carving their names in it.
Make sure that the slab goes down in one piece. DO NOT include any expansion joints otherwise the separate slabs will drift over the years and create dangerous joints. It is quite OK for the slab to develop cracks, the reinforcing will ensure that these cracks are not accompanied by dangerous changes in surface levels. In any case, the surface cracks will be covered by the synthetic mat.
Make sure that you DO NOT finish up with a glazed surface. If you do it will be extremely dangerous when wet. When finishing the concrete the final process is to go over it with a broom to give a textured finish that will provide grip to rubber soled shoes in wet conditions.
Prepare and Level the site
The idea is to use a grader to remove 50mm of topsoil from where the wicket will go leaving an exposed, flat soil surface 35 by 5 metres. Since the slab will be 100mm thick, the final surface of the wicket will be 50mm above the surrounding ground level. After construction, top soil will be battered up to the edge of the slab with the final result that rainwater will run off the wicket area. When you grade off the topsoil, keep it handy to put back as batter. You may choose to use a turf cutter to remove the turf before grading. This turf can be re-laid after the batter is put in place. If you use a turf cutter, remember to count the soil removed as part of the 50mm.
When taking off the topsoil you want to finish up with a surface that looks level to the naked eye. If it is perfectly level then the resultant wicket will be so level that water will not run off it. A 1 in a 100 fall to the left or right would be ideal. If it has humps or hollows in it you will finish up using too much concrete.
When levelling the site, make sure you leave room to put in place your formwork.
Formwork
It is best if you use 100mm C sections in 5 metre lengths. Using steel C sections makes it easier to use a screed to get the surface of the slab level. Using 5m lengths fits neatly with the dimensions of the wicket and flares.
Place the two wooden blocks so that they will make voids through the slab where the stumps are to go. The centres of these blocks should be 20,120mm apart.
Place the plastic sheeting so that it covers most of the dirt within the formwork box. Do not let the plastic extend beyond the edge of the slab (within 50mm of the edge will do, if it extends beyond the edge it will interfere with grass growth).
Ideally the reinforcing mesh should be 7mm bars at 200mm centres (F72), but you can get by with a lesser grade. Because of its size the slab will crack (that’s OK), what we need the reinforcing to do is to stop the various pieces from moving up and down in relation to each other. Place the reinforcing mesh so it is no more than 50mm above ground level and not within 50mm of the edge of the slab. Overlap and tie all joins.
The slab
The concrete does not need to be of superior construction quality. The standard brew for footpaths should do the job. We suggest 20mpa with a working time of 3 to 4 hours.
The idea is to pour the slab in one piece, starting at one end and working to the other. The should be NO expansion joints. Make sure the reinforcing stays in place on its bar chairs and is not trampled down to ground level. Make sure you don’t knock out of place the wooden voids for the stumps.
If you used 100mm C sections for formwork then you will find a 5m length of C section makes an ideal screed for getting the surface of the slab roughly level. Simply giggle it along the top of the formwork.
Once the concrete is in place and roughly level, gradually work it to give a smooth flat surface and work the edges with an edging trowel. Don’t forget to use the edge trowel around the voids for the stumps. Remove these wooden blocks once the concrete has “gone off” otherwise you will never get them out.
Remember, you do NOT want a glazed finish. You should finish the surface with a broom to give a slight textured finish that will not be slippery when wet.
Once the concrete has set firm you can carefully remove the formwork and patch up any imperfections along the edges.
On the top of one edge, adjacent to the stumps at one end, you may discreetly mark the date in letters 50mm high.
Drying time
What you don’t want is every kid in the neighbourhood carving his name in your handiwork, so it is wise to have some of your people watch over the wicket for the rest of the day. To keep them occupied they can carefully replace the topsoil over the still exposed earth and replace the turf on
f) Synthetic surface
You should leave the slab cure for about a week before laying the synthetic grass mat on top. Make sure the slab is clean and free of dirt, water and oil before you start.
The mat should be laid in one piece 22m long and 1.83m wide. Since the slab is 2m wide this will leave a strip of bare concrete about 85mm wide down either side of the mat. This is deliberate, the bare strips are used to stop grass from growing underneath the mat.
Firstly, without using any glue, place the mat in position so you can see how it is going to fit. Using some glue, anchor one end in place and carefully roll the other end up to it. Now, applying the glue as you go, work the mat up to the other end, unrolling it as you go. You do not need to stretch the mat tight, but you do need to roll out any bubbles and wrinkles as you go. Make sure that the edges are well stuck down, and take particular care at the four corners and where the bowlers run up.
Cut out the rectangular holes where the stumps go.
Mark the creases and leave the synthetic mat sit for one day before using it.
g) Marking creases
With white paint and a 1 inch brush you will need to mark a Bowling Crease and a Popping Crease at either end of the wicket. You will not be able to mark Return Creases as they fall outside the edges of the concrete slab. If in doubt, get an umpire to show you where the creases go – it’s very embarrassing if you put them in the wrong place.
The Bowling Crease is a line one inch thick running across the wicket so that its back edge would pass through the middle of the three stumps.
The Popping Crease is a line one inch thick running across the wicket so that its back edge is exactly 1.22m (four feet) in front of the back edge of the Bowling Crease. ie the back edge of the Popping Crease is 1.22m in front of the middle of the stumps.
If you are careful, you may mark a small line (10mm x 30mm) across the middle of the Popping Crease to show where “centre” is. This will discourage batsmen from wearing a hole in the synthetic when they mark their guard when coming in to bat.
Care and maintenance
In normal conditions a synthetic mat should last up to ten years or even longer. The worst problems are vandals, golf players and dirt or sand.
Vandals are your problem, but you should ensure that golfers do not practice their chip shots on your synthetic wickets – they leave little L shaped cuts on the surface.
If gritty dirt or sand gets into the surface it will grind and cut the base of the pile. The best solution is to use a high pressure water pump to blast the mat clean at the start of each season or as required.
You can repair cuts or holes in the synthetic mat by patching in a piece of synthetic with similar use. You can cut pieces out of the “spare” synthetic behind the stumps to effect repairs to damaged parts of the wicket.
When you reach the stage of replacing a synthetic wicket, keep what you can of the old one – it will be handy for practice wickets and repairs.
If your wicket needs to be covered during the off season so other sports can use the ground, ensure that a plastic sheet is placed over the synthetic before dirt or sand is placed on top.
Do not allow players to wear spikes on synthetic.
Local rules for synthetic wickets
When playing on synthetic wickets it is normal to adopt the following Local Rules:
a) On concrete or synthetic wickets a ball pitching off the wicket is a no-ball and is called as soon as it pitches.
Note that this is a No-ball as opposed to a Wide. The batsman cannot be out from a No-ball, but he may be out from a Wide. It can be embarrassing if the umpire calls Wide and the ball deflects from the grass at the edge of the pitch and hits the stumps or is taken as a catch. The bare concrete strip along the edge of the synthetic is not regarded as part of the wicket, so a ball pitching on the bare concrete or on the very edge of the synthetic is a No-ball.
b) A bad bounce from a join in a synthetic wicket is called Dead Ball and is replayed.
Fielders should be encouraged to be careful when returning the ball to the keeper or bowler. If it bounces on the bare concrete flares it will damage the ball. You may place synthetic to cover the concrete on the flares to overcome this problem.
Variations on a theme
We have found that the above gives an ideal concrete synthetic wicket. In particular, the flares at either end of the slab are desirable to stop erosion from bowlers and wicket keepers; the slab should be wider than the synthetic to help control grass which wants to grow under the synthetic; the slab should be laid in one piece without expansion joints to avoid “floating” over the years; and the top of the slab should be above natural ground level to allow storm water run-off.
The plastic liner under the slab is optional depending on local conditions. If the soil is dry it can tend to extract too much moisture from the slab while curing.
You can place a synthetic mat onto an existing concrete slab. This may mean foregoing the flares at either end, or that the slab is narrower in which case you may forego the protective strip down either side, or that the wicket is narrower.
If you can get hold of some spare or recycled synthetic you can use it to cover the bare concrete on the run-up flares. Looks good, makes the bowlers happy and protects the ball.
You can purchase synthetic wider than 1.83 metres. You may choose to install a wider wicket which will encourage batsmen to use their feet and go for strokes when the ball is pitched wide of the stumps.